Cyber Defenders - TeleStealer Writeup
Category: Malware Analysis
Checkout the lab here: https://cyberdefenders.org/blueteam-ctf-challenges/telestealer/
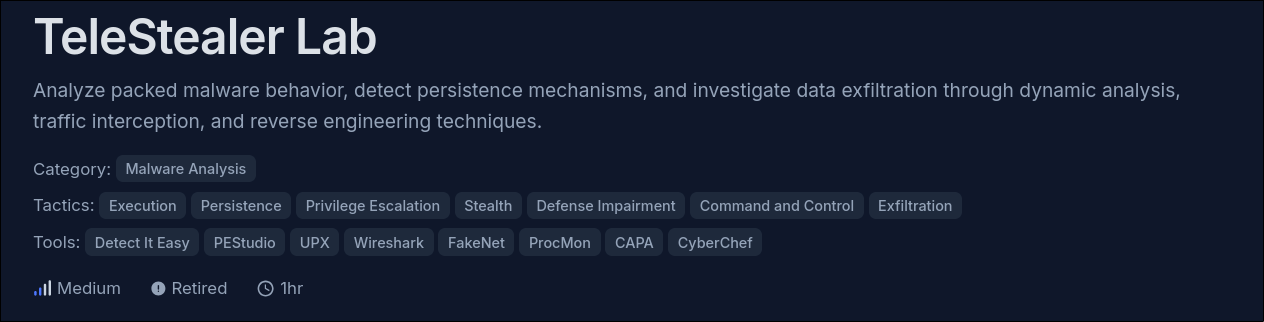
Description
At the company, our network team noticed a big increase in network activity on one of our computers in the last few days. After looking into it, we found out that an employee had downloaded untrusted software, but they weren’t sure what it was doing. We need you to investigate carefully and find out what it does.
Q1: Malicious software frequently employs diverse methods to hide its presence and avoid detection. What is the name of the packing tool that was utilized to obfuscate this malware?
The answer has 3 characters and the Tools section of the challenge already hinted at a packing tool, but let’s follow the proper steps.
Opening DIE and dragging the malware into it, initial analysis reveals the malware is packed using UPX.
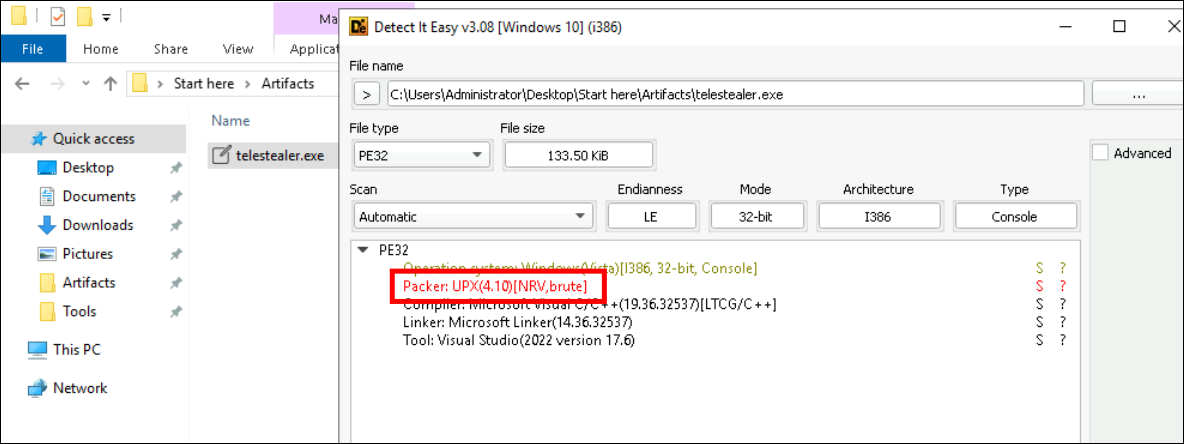
UPX (Ultimate Packer for eXecutables) is an open-source executable packer.
Answer: UPX
Q2: Since the malware author used multiple techniques to hide its functions, where does the malware place the second stage?
Let’s do some dynamic analysis to discover this malware. CyberDefenders’s machine is a perfect sandbox, so I can freely run it here.
Open up Process Monitor, remember to click on these two to easily track the process running.
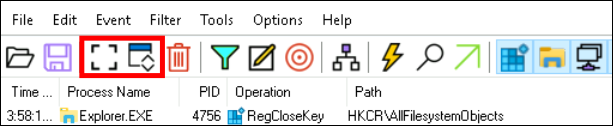
Double click the telestealer.exe to execute it. Might take several minutes.
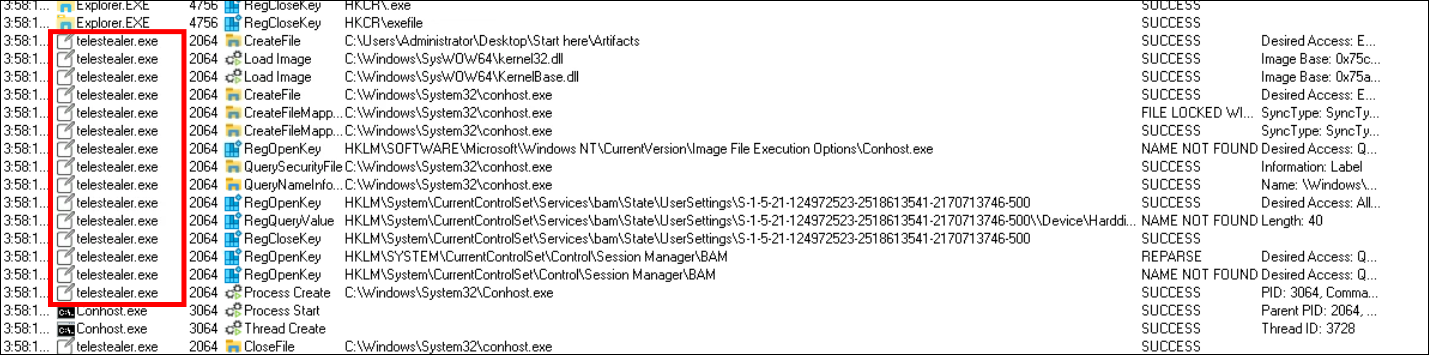
You will see malware activity being captured.
Once the malware finishes running (use your instinct to know when it will stop) you can click on the Capture button above or use Ctrl+E to stop capturing.
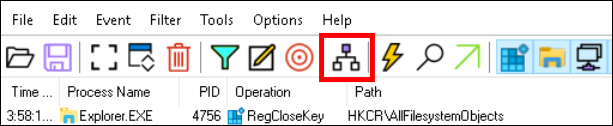
Use the Process Tree tab to easily track down the rogue process, as it shows all captured processes in a tree hierarchy overview.
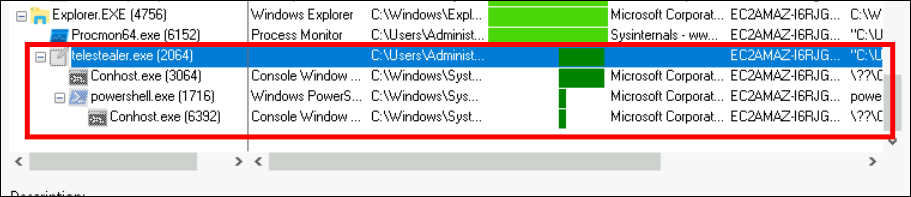
Here, you should know that Windows automatically spawns conhost.exe whenever a shell application (like PowerShell or CMD) is invoked.
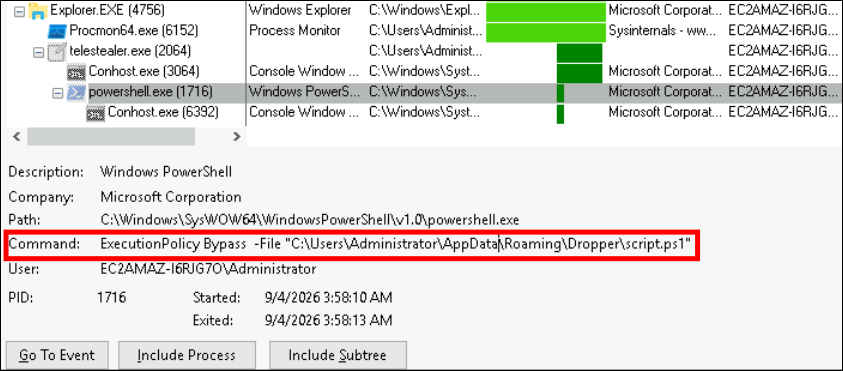
Looking at the command executed by the child process of telestealer.exe (PowerShell), it is evident that it’s attempting to call a script.ps1 file to execute the second-stage payload.
To determine whether this script.ps1 file was directly dropped by telestealer.exe or was already present, it’s time to use the filter tool.
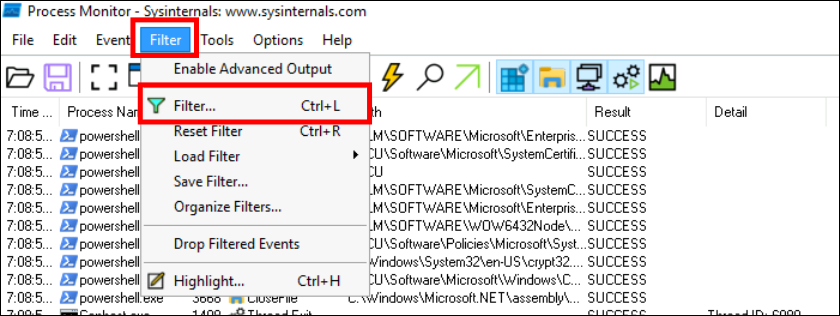
Inside the filter panel, there are already a few rules. I will add the following two rules:
- Process Name - is - telestealer.exe - include
- Path - contains - Dropper - include
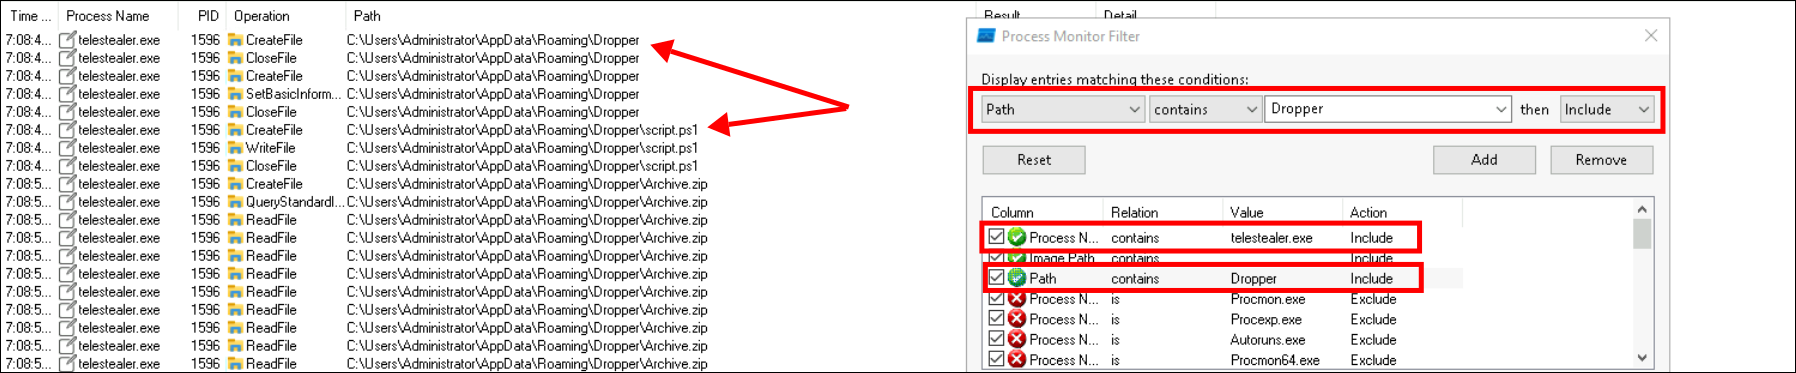
This confirms that the malware actually dropped the second-stage file and invoked PowerShell to execute it.
Answer: C:\Users\Administrator\AppData\Roaming\Dropper
Q3: Looking into how the malware persist on the machine, what’s the path of the registry key it uses to do this?
Still in the filter panel, I cleared the Path - contains - Dropper rule and added a new one: Operation - is - RegSetValue, because I wanted to check which registry values were actively set by telestealer.exe during execution.
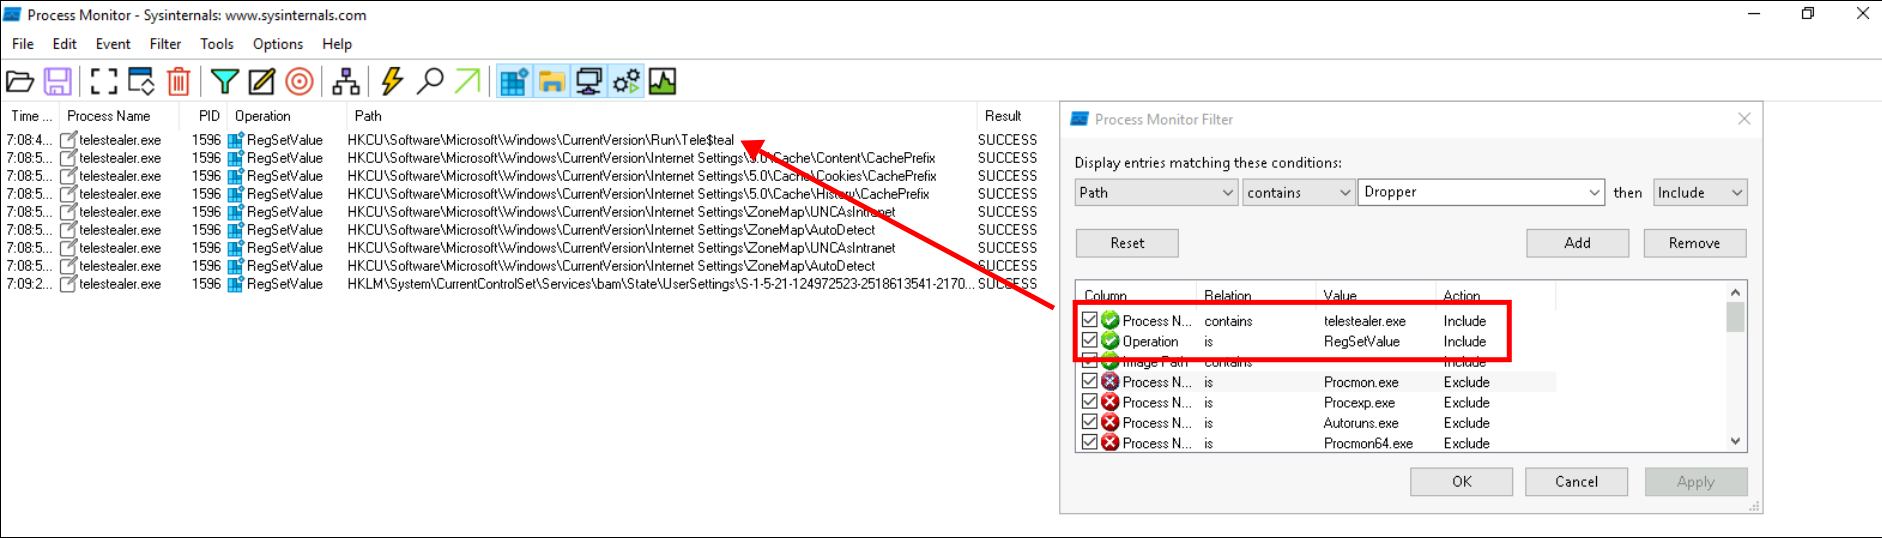
I immediately noticed in the first line that the malware executed RegSetValue to create a new key named TeleSteal at the path HKCU\Software\Microsoft\Windows\CurrentVersion\Run\TeleSteal.
Writing to the Run key is a classic technique for malware to establish persistence whenever a user logs into the system.
Answer: HKCU\Software\Microsoft\Windows\CurrentVersion\Run
Q4: We’ve noticed unusual network traffic in recent days since the discovery of the malware. We need to determine what data it might have sent out. What’s the path of the exfiltrated data?
To find the source of the stolen data, I examined the source code of the script.ps1 file (previously dropped by the malware into the Dropper directory).

Reading the script contents with Notepad clearly reveals the malware’s data collection behavior. The script uses Get-ChildItem to scan all files in the C:\Users\Administrator\Desktop path. It then uses a loop combined with the Compress-Archive command to silently compress all collected documents into an intermediate file named Archive.zip.
Answer: C:\Users\Administrator\Desktop
Q5: You’ve verified that the malware is gathering sensitive data from compromised machines. It mainly uses a separate communication channel to send out the data. What is the full domain that the malware uses to exfiltrate the data?
I ran the malware one more time, but this time I monitored its behavior using Wireshark.
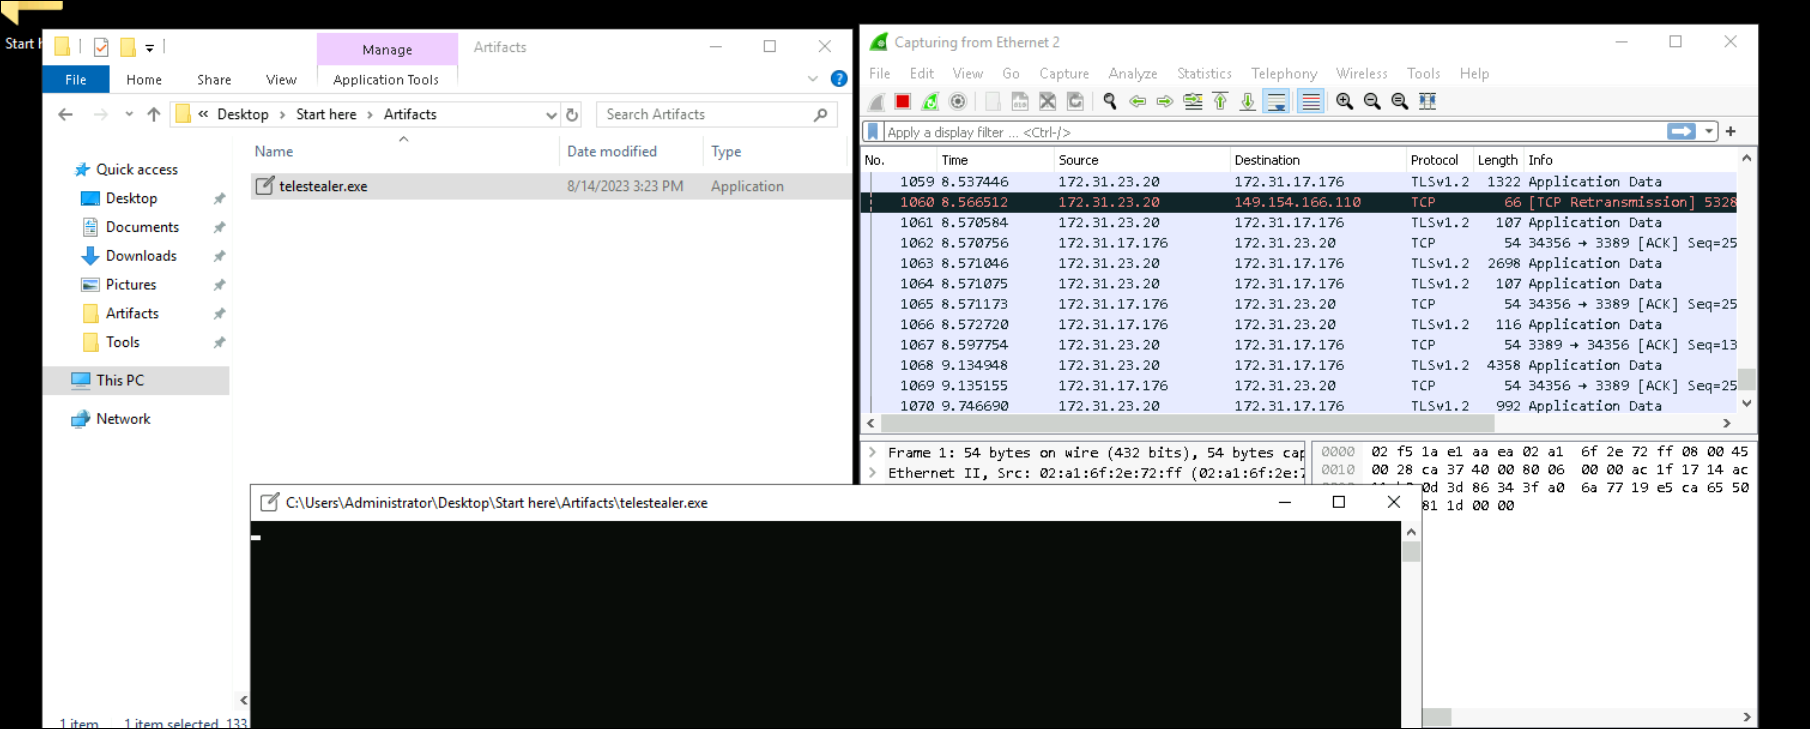
After the malware finished running, I stopped the packet capture and filtered for DNS queries: dns.

This revealed the domain the malware uses to exfiltrate data.
(Extra information: You can see our virtual machine 172.31.23.20 sending a DNS query to the destination address 172.31.0.2. If you are familiar with cloud architecture, 172.31.0.2 is the default address for Amazon Provided DNS. This indicates that the lab virtual machine is hosted on AWS infrastructure.
The lab creator apparently did not block DNS resolution services. My machine was seemingly allowed to connect to the actual AWS DNS server, and AWS DNS queried the real Internet to return Telegram’s real IP address to the malware.)
Answer: api.telegram.org
Q6: Once the channel is recognized, the next step is to determine who is receiving the exfiltrated data. Utilizing Python and the hosts file, can you determine the username of the recipient?
api.telegram.org is the official server address used to communicate with and call the API functions of the Telegram Messenger platform. It helps developers and third-party apps send/receive messages or automatically control Telegram Bots.
However, communicating with Telegram requires an internet connection, and in this sandbox, I cannot connect to the internet → I cannot get the response from the connection to api.telegram.org.
To solve this problem, I needed to redirect the packets, forcing the malware to send the data (the archive file) back to this virtual machine instead of sending it to the real Telegram server.
First, I opened the C:\Windows\System32\drivers\etc\hosts file with Administrator privileges and appended the following line:
1
127.0.0.1    api.telegram.org
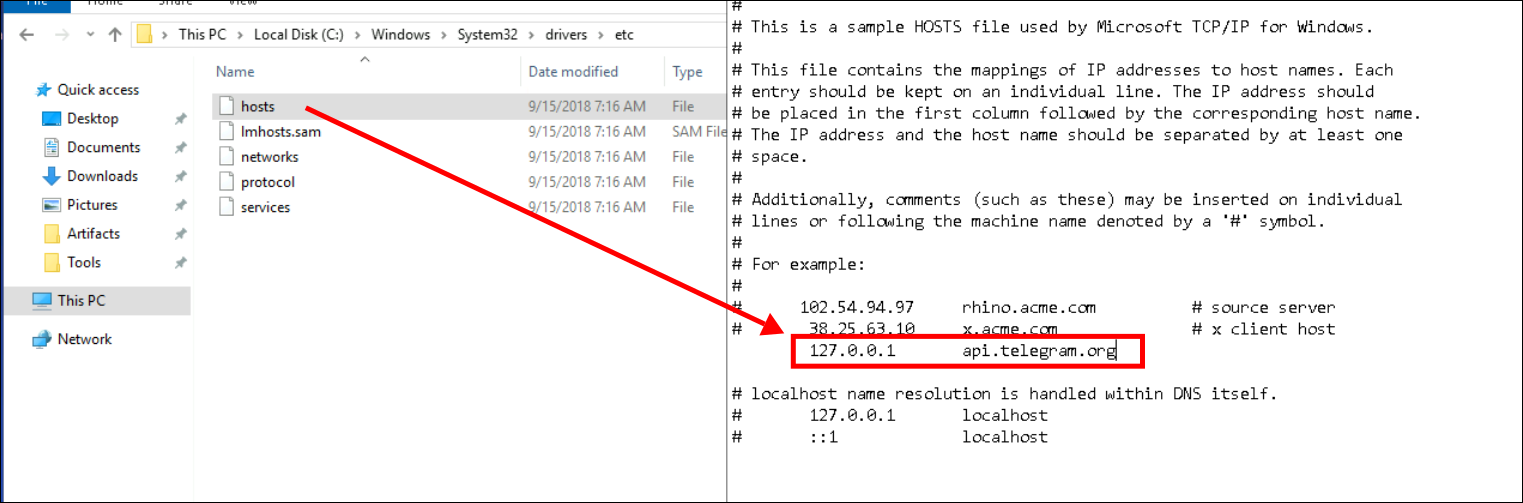
Purpose: To force the OS to resolve Telegram’s domain directly to localhost.
Next, I set up an HTTP server to capture the data.
I opened Command Prompt / PowerShell and ran the command to create a simple web server:
1
python -m http.server 80
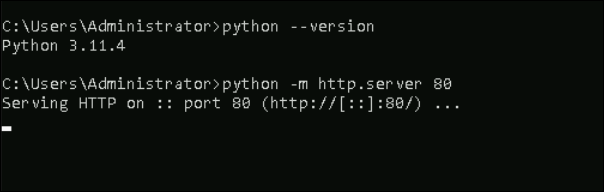
Finally, I executed the malware file one more time.

The virtual server successfully captured the malware’s query. Right in the packet’s URL, the malware exposed two pieces of information used to communicate with Telegram:
- Bot Token:
bot6369451776:AAEYgeQ04Cn15XIHhXTtzvcNDMahPNhh1Zo - Chat ID (Recipient ID):
7389421
The Python server returned a 404 error code. This is because the http.server module acts as a static file server. When the malware sent a request to the /bot… path, Python looked for a directory or file with that name in the current directory. Since no such file existed, it reported a 404 error. However, that’s fine because it’s not what I needed to find anyway.
Answer: bot6369451776
Conclusion
Through dynamic analysis using Process Monitor and Wireshark, I successfully mapped out the execution flow of the TeleStealer malware. Initially packed with UPX to evade static detection, the malware drops a secondary PowerShell payload (
script.ps1) into theAppData\Roaming\Dropperdirectory. It then establishes persistence by adding aTeleStealentry to theHKCU\Software\Microsoft\Windows\CurrentVersion\Runregistry key.For data exfiltration, the PowerShell script collects files from the Desktop, archives them into a zip file, and transmits them to a threat actor’s Telegram bot via the
api.telegram.orgAPI. By manipulating the localhostsfile to resolve the domain to localhost and intercepting the traffic with a Python HTTP server, I successfully captured the outbound request, revealing the attacker’s Telegram Bot Token and Chat ID.